This will be the sixth of a series of posts I will be doing over the next few weeks. They will all lead up to the introduction of my new course in January 2020 titled, “Building Your First Lightning Web Component for Salesforce” from Pluralsight. These posts will contain final code snippets of the code used in each course module, but will not include all the tips and best practices about using Visual Studio Code and SFDX, along with the way I personally approach teaching in my video courses.
Handling Testing and Wrapping Up
If you are already a Salesforce developer then you know that server-side Apex Unit tests are required, but client-side JavaScript tests are not and if you are like most developers, you probably think that creating tests should be optional, kind of like documenting, right?
You might not believe this, but writing tests (even for non-required JavaScript) can actually save you a lot of time, such as:
- Time from chasing down bugs
- Fixing those bugs
- Releasing your fix using whatever release process your company uses
Introducing Jest
Jest is an easy to use tool that was originally created by the engineers at Facebook. It is now supported as open-source by the community. Salesforce DX provides a utility that lets you setup and configure Jest for your LWC project.
There are a few steps involved in getting this setup, which include:
- Install prerequisites (which includes the latest versions of node.js and npm). Even if you already have node installed, it is recommended that you install the Long Term Support Version of Node.js, which will also include npm. This will guarantee that critical bugs will be fixed for a total of 30 months. You can install the LTS version from here.
- Setup LWC VS Code project with npm – Go to the Terminal window in your VS Code project and from the root folder, run the following command:
npm init
This will create a package.json file. Just hit enter through all the prompts
- Install sfdx-lwc-jest and dependencies – Also from Terminal window:
npm install
This will create a package-lock.json file
npm install @salesforce/sfdx-lwc-jest --save-dev
- Identify test script – Open the package.json file and add this to the scripts section:
,
    "test:unit": "sfdx-lwc-jest --coverage",
    "test:unit:watch": "sfdx-lwc-jest --watch",
    "test:unit:debug": "sfdx-lwc-jest --debug"
Writing Jest Tests
Unlike Apex unit tests, Jest tests are run locally and are completely independent of Salesforce. As a best practice, you should create all your tests in a special folder at the root of your project that is named __tests__. If you look at the .forceignore file in your project, you will see that an entry for this folder already exists, thus excluding any tests from being pushed to your scratch org.
In the course, I walk you through creating a test of the leadList component. That test is just a JavaScript file that is created in the __tests__folder and is named: leadList.test.js (which is also a recommended best practice). In that folder, there is also a data subfolder that contains two JSON files named: getLeads.json and getNoLeads.json. Below is the code for the test:
import { createElement } from 'lwc';
import leadList from 'c/leadList';
import { registerApexTestWireAdapter } from '@salesforce/sfdx-lwc-jest';
import searchLeads from '@salesforce/apex/LeadSearchController.searchLeads';

// Represent a list of valid records
const mockGetLeads = require('./data/getLeads.json');
// Represent a list of no records
const mockGetNoLeads = require('./data/getNoLeads.json');
// Register the Apex wire adapter
const searchLeadsAdapter = registerApexTestWireAdapter(searchLeads);

describe('c-lead-list', () => {
    beforeAll(() => {
        // Use fake timers as setTimeout
        jest.useFakeTimers();
    });

    // Best practice to cleanup after each test
    afterEach(() => {
        // The jsdom instance is shared across test cases in a single file so reset the DOM
        while (document.body.firstChild) {
            document.body.removeChild(document.body.firstChild);
        }
    });

    describe('searchLeads @wire returns records with search parameter', () => {
        it('called with data from input', () => {
            const USER_INPUT = 'Bertha';
            const SEARCH_TERM = { searchTerm: USER_INPUT };

            // Create the leadList element
            const element = createElement('c-lead-list', {
                is: leadList
            });
            document.body.appendChild(element);

            // Simulate user input
            const inputValue = element.shadowRoot.querySelector('lightning-input');
            inputValue.value = USER_INPUT;
            inputValue.dispatchEvent(new CustomEvent('change'));

            // Run the fake timers
            jest.runAllTimers();

            // Return a promise to wait for asynchronous results
            // and fail if promise is rejected
            return Promise.resolve().then(() => {
                expect(searchLeadsAdapter.getLastConfig()).toEqual(
                    SEARCH_TERM
                );
            });
        });

        it('renders data of one record', () => {
            const USER_INPUT = 'Bertha Boxer';

            // Create the leadList element
            const element = createElement('c-lead-list', {
                is: leadList
            });
            document.body.appendChild(element);

            // Simulate user input
            const inputValue = element.shadowRoot.querySelector('lightning-input');
            inputValue.value = USER_INPUT;
            inputValue.dispatchEvent(new CustomEvent('change'));

            // Run the fake timers
            jest.runAllTimers();

            // Use the searchLeadsAdapter to emit data
            searchLeadsAdapter.emit(mockGetLeads);

            // Return a promise to wait for asynchronous results
            // and fail if promise is rejected
            return Promise.resolve().then(() => {
                // select some elements that would be rendered if it succeeded
                const detailElement = element.shadowRoot.querySelector('lightning-datatable');
                const rows = detailElement.data;
                expect(detailElement.length).toBe(searchLeadsAdapter.length);
                expect(rows[0].Name).toBe(mockGetLeads[0].Name);
            });

        });

        it('renders data when no record is available', () => {
            const USER_INPUT = '';

            // Create the leadList element
            const element = createElement('c-lead-list', {
                is: leadList
            });
            document.body.appendChild(element);

            // Simulate user input
            const inputValue = element.shadowRoot.querySelector('lightning-input');
            inputValue.value = USER_INPUT;
            inputValue.dispatchEvent(new CustomEvent('change'));

            // Run the fake timers
            jest.runAllTimers();

            // Use the searchLeadsAdapter to emit data
            searchLeadsAdapter.emit(mockGetNoLeads);

            // Return a promise to wait for asynchronous results
            // and fail if promise is rejected
            return Promise.resolve().then(() => {
                // select some elements that would be rendered if it succeeded
                const detailElement = element.shadowRoot.querySelector('lightning-datatable');
                expect(detailElement.length).toBe(searchLeadsAdapter.length);
            });
        });

    });

    describe('searchLeads @wire returns error', () => {
        it('shows error panel', () => {
            // Create the leadList element
            const element = createElement('c-lead-list', {
                is: leadList
            });
            document.body.appendChild(element);

            // Emit error from @wire
            searchLeadsAdapter.error();

            // Return a promise to wait for any asynchronous DOM updates. Jest
            // will automatically wait for the Promise chain to complete before
            // ending the test and fail the test if the promise rejects.
            return Promise.resolve().then(() => {
                const errorPanelEl = element.shadowRoot.querySelector(
                    'c-error-panel'
                );
                expect(errorPanelEl).not.toBeNull();
            });
        });
    });

})
And here are the two data files:
getLeads.json:
[
    {
        "Name": "Bertha Boxer",
        "Phone": "(850) 644-4200",
        "Company": "Farmers Coop. of Florida",
        "Title": "Director of Vendor Relations",
        "Street": "321 Westcott Building",
        "City": "Tallahassee",
        "State": "FL",
        "PostalCode": "32306"
    }
]
and getNoLeads.json:
[]
Running Jest Tests
To run the test seen above, you will need to return to the Terminal window and run this command:
npm run test:unit
Wrapping Up
So, this is the last post in the series and I should be announcing the release of this course soon. Sorry it has taken so long, but I hope you go away with these thoughts:
- Less frameworks; more web standards
- Embrace VS Code and Salesforce DX
- Use CustomEvents when possible
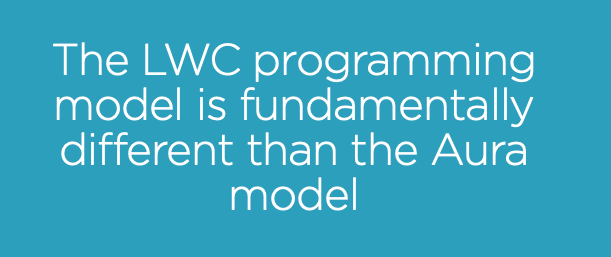
- LWC programming model is very different
- Never be embarrassed about mistakes
- Keep learning and share it