The big news at this year’s Dreamforce (2023) was the prominence of AI across the Salesforce platform. Generative AI is not new to Salesforce, but soon it will be baked into almost every product through the Einstein 1 Platform.
The core of this is the new Einstein One Copilot, which will function as a personal assistant in nearly all Salesforce apps including Sales, Service, Marketing, Commerce, Tableau, MuleSoft, and Canvas. At Dreamforce, Salesforce indicated that most Einstein One features will be generally available (GA) in the first quarter of 2024. Check out this link for a Salesforce cheat sheet on pricing and readiness guide.
But you don’t need to wait for 2024 to start planning. The time to start preparing for successful AI implementation is now. Proper planning and preparation is crucial for integrating AI in a way that augments human capabilities. Think of it as a journey that will require adjustments along the way.
The time to start preparing and designing a successful AI implementation is now.
So, what can you do know to prepare for this journey?
Step 1 – Learn more about Generative AI
Even if you use ChatGPT all the time, you need to learn more about Generative AI and all what all tools and capabilities are available or soon to be available in Salesforce. The best place to start is with Trailhead and the module about Generative AI Basics.
You may also want to check out Artificial Intelligence for Business. I have already gone through many modules myself and will recommend other relevant ones as I continue my own learning journey.
If you work with large datasets and have access to an enterprise or unlimited edition, you can access a free tier of Data Cloud. Your AI use cases may demand connecting all your data into a single view for customers. One that takes into account historical data to make better predictions.
It may be necessary to use Data Cloud to connect and harmonize your data. You may even have to build tools to easily embed historical data into prompts. Access to the free tier should help you to get started.
More is coming in Spring ’24. I’ll report my findings here, so stay tuned!
I’m excited by Salesforce’s consistent AI infusion across apps. With mainstream ChatGPT adoption, the timing is perfect. The Salesforce platform is ideal for delivering AI capabilities to business users. Start preparing now to ensure your AI implementation succeeds.
I have had a few people ask me this question and I think it is a good one, so I wanted to answer it in a post. First of all, for anyone not sure what the difference is between Aura and LWC, you might want to checkout this post I did.
As for the answer….wait for it…..It depends. It depends on:
How experienced you are as a Developer with JavaScript and HTML5, or modern development tools such as Visual Studio Code, Command Line Interfaces, GitHub? If you are very experienced and have even done work with React or Angular, then I would suggest starting with LWC’s. Developing with Aura components is a legacy method that Salesforce is not actively enhancing.
HOWEVER, If you are supporting or might be supporting a legacy Salesforce org? Knowing about Aura (and even Visualforce) is a very valuable skill set to have. For example, if you are doing work for a large org that is currently using many Aura components and there is no need to change these components, then having that Aura skillset can be invaluable. If you want to learn about Aura components, you night want to check out this course I did on Pluralsight. Most importantly, as of early 2023, LWC’s cannot be used to override standard buttons. (NOTE: HOWEVER, in 2024, allowing for the override was added to the Roadmap for LWC, so this limitation is being actively worked on).
Like Salesforce Evangelists, I do think that LWC’s are the better alternative in terms of component performance, but if all you need to build are very simple components, then there is no reason why you cannot start with Aura and transition to LWC’s. To be entirely honest, LWC’s are more challenging to create for developers that are not already familiar with modern web development.
I hope this post helps anyone not sure about which technology to approach first. Feel free to reach out to me if you have additional questions or concerns.
Today my course about Getting Started with Salesforce Lightning Web Components was published on Pluralsight. This is my 14th course for Pluralsight. This not a tutorial. Instead, I tried to to explain why things were done the way they were and provide tips for how you can do the same when building your own solutions.
10 minute preview video
If you do not have a subscription to Pluralsight, you can always sign up for a free 10-day trial here. I have also created a GitHub repo that contains all the code for the course. Here you will find detailed instructions for how to install this in your own scratch org.
UPDATE: As of 2024, LWC.Studio is shutting down and the tool I used in this post is only available in read mode. Salesforce now recommends you use a tool called StackBlitz to Fork the LWC GitHub repo and create your prototypes, such as what you see here.
This post is in preparation for my soon to be released Pluralsight course, Getting Started with Salesforce Lightning Web Components. While creating that course, I realized how super valuable a tool called webcomponents.dev can be for prototyping an app using Lightning web components (LWC’s).
I created a sample app using their free online IDE. This prototype uses the scaffolding provided for a basic LWC app, with nested components. I am using JSON data to render a list of product tiles. My favorite reasons to use this tool:
See preview of app immediately – In VS Code, you have to configure your meta config file to expose the component, push/deploy to an org and then open that org to see the results. Best of all, you can see it on different screen sizes like tablet and phone.
Integration with GitHub – Create a new repo and then create a branch to make changes.
Share results with others – You can share with a URL (as I have done in this post) or by posting right to Twitter. Share as either a simple view or in play mode where the user is not required to fork for tinkering with the code.
This tool was selected by Salesforce to replace the old playground feature, that has been deprecated. In all fairness, this tool is so much better than the playground. You can use it to create more than just LWC apps. It supports JavaScript, TypeScript, React, Vue 3, etc.
All that being said, this is NOT a replacement for the Salesforce CLI or the Salesforce Extensions for VS Code.
All that being said, this is NOT a replacement for the Salesforce CLI or the Salesforce Extensions for VS Code. I would just use this for prototyping an app quickly or testing out a LWC base component.
🤯 This weekend, I discovered an issue trying to debug a Lightning Web Component in the Chrome debugger tools.
UPDATE on 11/13/2022: Salesforce includes a way to automatically disable LWS for your scratch orgs through the security settings in your config/project-scratch-def.json file. You will simply need to add a sessionSetting for lockerServiceNext set to false. Instructions below show you how to do this through Setup. Thanks to Grzegorz Skaruz for pointing this out.
If you try to debug JavaScript in a scratch org using the Chrome Debugger, you will no longer see the components listed in the page hierarchy under the Sources tab (like you may be used to doing).
To still debug your LWC’s, you will need to first disable this feature in your scratch org. You can do this in:
Session Settings -> Uncheck “Use Lightning Web Security for Lightning Web Components”. Click Save.
Unfortunately, it is still hard to see where to go in Chrome Debugger. But, you expand the c subfolder under components (see image below).
Chrome Debugger After LWC Disabled in Scratch Org
Good luck and if you find a better way to do this, please leave a comment below to help others.
Top five best practices for Lightning Web Components (LWC)
👏🏽 The following best practices are in order of importance.
# 1 – Always Cache Data
Lightning web components offer two ways to cache data. The first is to use Lightning Data Service, which automatically handles security for you. The best part is that you do not have to write any Apex classes – especially platform required test classes.
If you must use Apex, then you can simply mark your methods as cacheable using the AuraEnabled annotation. The Winter 23 release introduced the global scope option for this annotation.
@AuraEnabled(scope=global)
public static myCacheableMethod() {}
# 2 – Use Conditional Rendering
Conditional rendering means that portions of a component will not be rendered until a condition is met.
For example, let’s assume you had a component that displayed a list of widget data. You would not want the list to be built unless there was data available. If there was no data, then the user would see a message telling them there are no widgets.
<div if:true{widgets}>
   <template for:each={widgets} for:item="widget">
       <li key={widget.Id}>{widget.Name}</li>
   </template>
</div>
<div if:false{widgets.length}>
   There are no widgets available
</div>
#3 – Use Pagination with Lists
While we are on the topic of lists, rendering a list of data has the potential for causing lots of performance problems. Many Salesforce orgs have custom objects that contain hundreds, thousands, if not millions of records.
The best way to prevent these lists from getting out of control is to introduce a pagination component. You can see an example of this in the eBikes GitHub repository.
There are now 94 base Lightning web components to choose from. They cover everything from a simple input box to a complex record form.
These components not only offer the CSS from the Salesforce Lightning Design System (SLDS), but they offer a performance advantage. These components are already rendered at the client-side, so they do not require additional download processing.
# 5 – Use SLDS Icons and Styling
And since I mentioned the SLDS, let me remind you that the Lightning Design System website offers hundred of optimized icons. Using your own customized icons can result is low render quality and resolution, so be sure to take advantage to these readily available goodies.
Want to learn more about Lightning Web Components?
In the last post, I showed you a solution to display products, but only focused on how parent to child communication worked in that example. In this post, I will point out the portions of the code that involve working with an unrelated component and show you the unrelated component that displayProducts will be working with.
Just to refresh your memory, the code for displayProducts is as follows:
<!-- displayProduct.html -->

<template>
    <div class="slds-card slds-var-p-around_x-small">
        <lightning-input
            label="Search Key"
            type="text"
            onchange={handleSearchKeyChange}
            class="search-bar"
        ></lightning-input>
        <template if:true={products.data}>
          <template if:true={products.data.length}>
             <div class="content">
                <template for:each={products.data}
                     for:item="product">
                     <!-- Product Tile Component here-->
                     <c-product-tile
                        key={product.Id}
                        product={product}
                        onselected={handleProductSelected}
                        class="slds-var-m-around_x-small">
                     </c-product-tile>
                 </template>
              </div>
            </template>
            <template if:false={products.data.length}>
                <p>No products matching your selection</p>
            </template>
        </template>
        <template if:true={products.error}>
            <p>Error when getting product data</p>
        </template>
    </div>
</template>


// displayProducts.js

import { LightningElement, wire } from 'lwc';

import { publish, MessageContext } from 'lightning/messageService';
import PRODUCT_SELECTED_MESSAGE from '@salesforce/messageChannel/ProductSelected__c';

// getProducts() method in ProductController Apex class
import getProducts from '@salesforce/apex/ProductController.getProducts';

export default class DisplayProducts extends LightningElement {

    searchKey = '';

    // Load context for Lightning Messaging Service
    @wire(MessageContext) messageContext;

    //Publish ProductSelected message
    handleProductSelected(event) {
        publish(this.messageContext, PRODUCT_SELECTED_MESSAGE, {
            productId: event.detail
        });
    }

    // Load the list of available products.
    @wire(getProducts, { searchKey: '$searchKey' })
    products;

    handleSearchKeyChange(event) {
        this.searchKey = event.target.value.toLowerCase();
    }

}
Notice in the code above that each productTile uses an onselected event to fire off the handleProductSelected function. Also notice that at the top of the JavaScript controller, publish and MessageContext functions are imported from lightning/messageService. These are required when working with Lightning Message Service (LMS).
Working with Lightning Message Service
Lightning Message Service (LMS) was introduced in Summer 20 and it offers a standard way to communicate across the DOM, or Document Object Model. LMS can be used with LWC’s, along with Aura components and even Visualforce pages – as long as they are contained within the same lightning page.
The Lightning App Page that is used to host the solution has two regions. displayProducts will be loaded into the left-hand region and on the right will be a new component named productCard.
When a user clicks a product tile in displayProducts, a message will be sent to the productCard component, allowing it to display additional detail information. Communicating with unrelated components allows a user to easily switch between the tiles and additional product information without having to navigate to an actual Salesforce detail page.
Component that should receive data will subscribe to the message channel
Below is the code for the productCard component (which is the unrelated component in this example):
<!-- productCard.html -->

<template>
    <lightning-card icon-name="standard:apex_plugin">
        <template if:true={recordId}>
            <span slot="title">{productName}</span>
            <lightning-button-icon
                icon-name="utility:expand_alt"
                slot="actions"
                onclick={handleNavigateToRecord}
            ></lightning-button-icon>
            <div class="slds-var-m-horizontal_medium">
                <img
                    if:true={productPictureUrl}
                    src={productPictureUrl}
                    class="product"
                    alt="Product picture"
                />
                <lightning-record-view-form
                    record-id={recordId}
                    onload={handleRecordLoaded}
                    object-api-name="Product2"
                    density="compact"
                >
                    <lightning-output-field
                        field-name={familyField}
                    ></lightning-output-field>
                    <lightning-output-field
                        field-name={productCodeField}
                    ></lightning-output-field>
                    <lightning-output-field
                        field-name={msrpField}
                    ></lightning-output-field>
                    <lightning-output-field
                        field-name={descriptionField}
                    ></lightning-output-field>
                </lightning-record-view-form>
            </div>
        </template>
        <template if:false={recordId}>
            <div class="slds-var-p-around_large">
                <p class="placeholder">Select a product to see details</p>
            </div>

        </template>
    </lightning-card>
</template>

//  productCard.js

import { LightningElement, wire } from 'lwc';

// Lightning Message Service and a message channel
import { NavigationMixin } from 'lightning/navigation';
import { subscribe, MessageContext } from 'lightning/messageService';
import PRODUCT_SELECTED_MESSAGE from '@salesforce/messageChannel/ProductSelected__c';

// Utils to extract field values
import { getFieldValue } from 'lightning/uiRecordApi';

// Product__c Schema
import PRODUCT_OBJECT from '@salesforce/schema/Product2';
import NAME_FIELD from '@salesforce/schema/Product2.Name';
import PRODUCT_CODE_FIELD from '@salesforce/schema/Product2.ProductCode';
import FAMILY_FIELD from '@salesforce/schema/Product2.Family';
import MSRP_FIELD from '@salesforce/schema/Product2.MSRP__c';
import DESCRIPTION_FIELD from '@salesforce/schema/Product2.Description';
import PICTURE_URL_FIELD from '@salesforce/schema/Product2.Picture_URL__c';

/**
 * Component to display details of a Product__c.
 */
export default class ProductCard extends NavigationMixin(LightningElement) {
    // Exposing fields to make them available in template
    familyField = FAMILY_FIELD;
    msrpField = MSRP_FIELD;
    productCodeField = PRODUCT_CODE_FIELD;
    descriptionField = DESCRIPTION_FIELD;

    // Id of Product__c to display
    recordId;

    // Product fields displayed with specific format
    productName;
    productPictureUrl;

    /** Load context for Lightning Messaging Service */
    @wire(MessageContext) messageContext;

    /** Subscription for ProductSelected Lightning message */
    productSelectionSubscription;

    connectedCallback() {
        // Subscribe to ProductSelected message
        this.productSelectionSubscription = subscribe(
            this.messageContext,
            PRODUCT_SELECTED_MESSAGE,
            (message) => this.handleProductSelected(message.productId)
        );
    }

    handleRecordLoaded(event) {
        const { records } = event.detail;
        const recordData = records[this.recordId];
        this.productName = getFieldValue(recordData, NAME_FIELD);
        this.productPictureUrl = getFieldValue(recordData, PICTURE_URL_FIELD);
    }

    /**
     * Handler for when a product is selected. When `this.recordId` changes, the
     * lightning-record-view-form component will detect the change and provision new data.
     */
    handleProductSelected(productId) {
        this.recordId = productId;
    }

    handleNavigateToRecord() {
        this[NavigationMixin.Navigate]({
            type: 'standard__recordPage',
            attributes: {
                recordId: this.recordId,
                objectApiName: PRODUCT_OBJECT.objectApiName,
                actionName: 'view'
            }
        });
    }
}
Notice in the HTML code above (which is bolded), there is a lightning button icon component. If clicked the user will be directed to the products record page. This is just in case that is what the user would prefer to happen. Displaying the record detail information will be done using the lightning record view form base component, along with several output field base components.
Also notice in the Javascript code, import statements to access functions from the lightning message service, as well as the newly created message channel. The next import statement will include the uiRecordApi utility that allows me to extract field values for product fields, along with several import statements used to access schema metadata for specific Product2 fields.
Inside the class, I will begin by adding some local variables that will expose some of that schema metadata. Below that I need to define the scope of the message context, which in this case will just be the default of the active area. This is only available to me when using the @wire context.
Next is the handleRecordLoaded handler which is fired when the lightning record view form base component first loads. It will get the product record ID passed in the event message channel and use the uiRecordApi to extract the field values for the product name and picture URL.
The end result of this solution are two unrelated components that communicate seamlessly. The image below shows you what it looks like to have the components work together in a Lightning page for Experience Cloud.
Final rendered solution in Experience Cloud
The code and explanations in this post is just a sample of all that is covered in the Pluralsight course, “Communicate Between Salesforce Lightning Web Components”. Check that out if you are interested in learning more about how LWC’s communicate. You can also check out a free 10 minute preview video that explains how I got to this point in the post series.
The second course in a new Skill Path series on Pluralsight, designed to help prepare you for the Salesforce Certified Sharing and Visibility exam was just published. The new course is titled, “Share Salesforce Data Across Users, Groups, and Roles“.
Using a real-world scenario involving a global company, you’ll learn how to build a record sharing model for your Salesforce org. First, you’ll explore the Salesforce sharing architecture and the different layers of record sharing security Salesforce provides.
From there, you’ll discover how to set org-wide defaults and design a role hierarchy. Finally you will learn how to open up access when needed with sharing rules or manual sharing. When you’re finished, you will have the skills and knowledge to design a robust and secure sharing model for your Salesforce organization.
And look out for future posts on this blog about this very complex and critical piece of the Salesforce Security architecture.
Public properties can be used to pass data from a parent component to one or more children components. For Lightning Web Components (LWC), data is passed from the parent to the child using the @api decorator.
Parent to Child Communication
Decorators are used in JavaScript to wrap one piece of code with another. That is why they are called decorators. The @ symbol is placed before the name of the decorator and for LWC the @api decorator is a special decorator used to expose public properties or methods.
When used with a property, these properties/fields are reactive. This means whenever the value of the property changes, the component is automatically rerendered. For this reason, each property can be associated with only one decorator. This also applies when a method is decorated.
Displaying Products
In this post, I will be working with nested components used to search for and display products. The parent or container component will be named displayProducts. The code for this component is seen below:
<!-- displayProduct.html -->

<template>
    <div class="slds-card slds-var-p-around_x-small">
        <lightning-input
            label="Search Key"
            type="text"
            onchange={handleSearchKeyChange}
            class="search-bar"
        ></lightning-input>
        <template if:true={products.data}>
          <template if:true={products.data.length}>
             <div class="content">
                <template for:each={products.data}
                     for:item="product">
                     <!-- Product Tile Component here-->
                     <c-product-tile
                        key={product.Id}
                        product={product}
                        onselected={handleProductSelected}
                        class="slds-var-m-around_x-small">
                     </c-product-tile>
                 </template>
              </div>
            </template>
            <template if:false={products.data.length}>
                <p>No products matching your selection</p>
            </template>
        </template>
        <template if:true={products.error}>
            <p>Error when getting product data</p>
        </template>
    </div>
</template>


// displayProducts.js

import { LightningElement, wire } from 'lwc';

import { publish, MessageContext } from 'lightning/messageService';
import PRODUCT_SELECTED_MESSAGE from '@salesforce/messageChannel/ProductSelected__c';

// getProducts() method in ProductController Apex class
import getProducts from '@salesforce/apex/ProductController.getProducts';

export default class DisplayProducts extends LightningElement {

    searchKey = '';

    // Load context for Lightning Messaging Service
    @wire(MessageContext) messageContext;

    //Publish ProductSelected message
    handleProductSelected(event) {
        publish(this.messageContext, PRODUCT_SELECTED_MESSAGE, {
            productId: event.detail
        });
    }

    // Load the list of available products.
    @wire(getProducts, { searchKey: '$searchKey' })
    products;

    handleSearchKeyChange(event) {
        this.searchKey = event.target.value.toLowerCase();
    }

}
Things to notice in the bolded portion of the displayProducts.html file above:
Since a search may return multiple products, a child component named productTile will be used to display just one product as a tile.
An iterator will be used to display as many instances of this child component as there are records returned.
I am passing the product id through the key attribute and the actual product data through the product attribute.
Here is the HTML and JS for the productTile component.
Things to notice in the bolded portion of the productTile.js file above:
api was added to the list of modules to be imported.
Below that will be private variables used for the product data passed from the parent component.
Data will be passed to the child through getter and setter functions, which need to be annotated with the @api decorator, in order to make them public.
The end result of all of this is a component that looks like this:
Final rendered version of the displayProducts component with child productTile component
The code and explanations in this post is just a sample of all that is covered in the Pluralsight course, “Communicate Between Salesforce Lightning Web Components”. Check that out if you are interested in learning more about how LWC’s communicate.
Are you a Salesforce developer that has been tasked with building a complex app involving multiple Lightning Web Components (LWC’s)?
The most important thing to understand is all the ways these components can communicate. Without a solid understanding of this concept, you may struggle and inadvertently create a poor performing or error prone app.
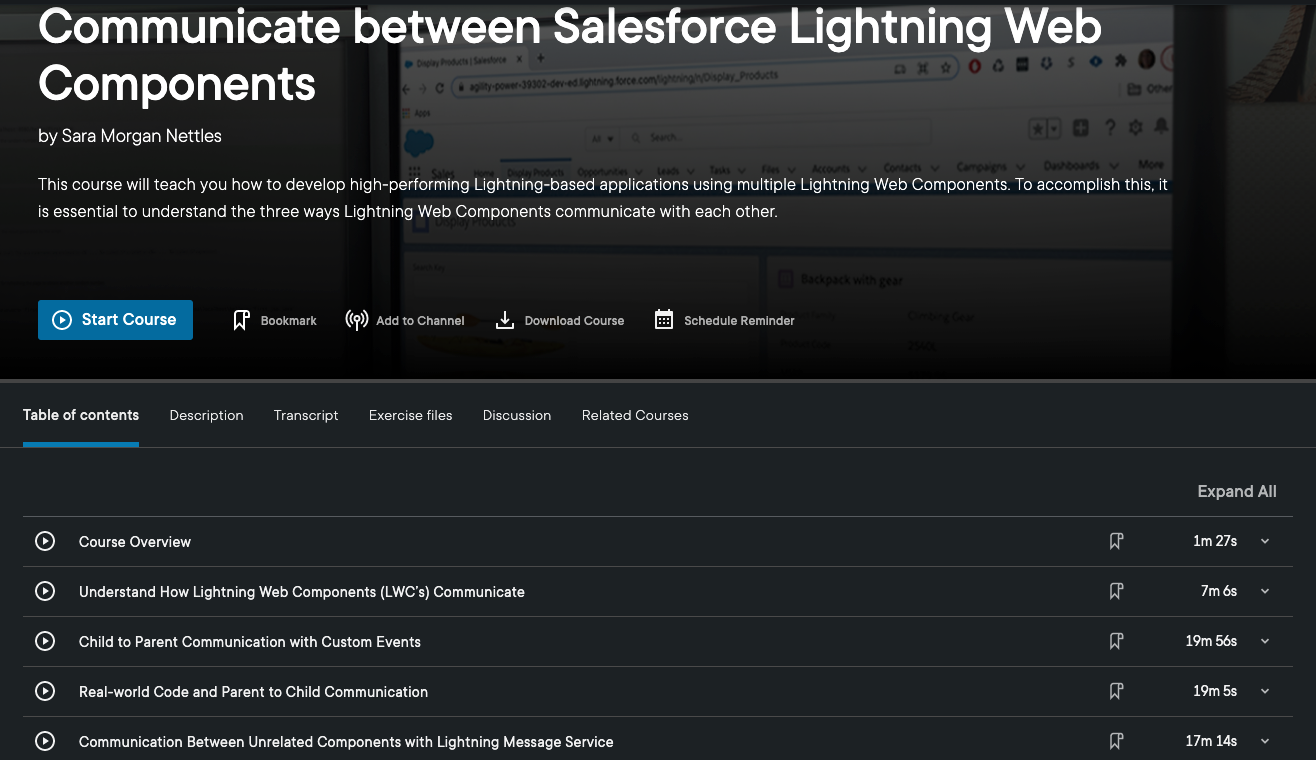
That is why I am happy to announce that my latest Pluralsight course, “Communicate Between Salesforce Lightning Web Components” has just been released. This is not a course for beginners new to LWC’s or Salesforce. But, if you plan on building an app that involves multiple LWC’s and you already know the basics, then this course is for you.
Communicate Between Salesforce Lightning web Components
In this course you will learn how to effectively communicate between LWC’s. First you will discover the three methods used to communicate between components. Then you will learn details about each method by seeing how they work in a real-world app. By the end of the course, you will know how to build your own high-performing Lightning-based app that is assembled with Lightning Web Components. This course is focused solely on LWC communication.
I hope you find the course useful. If you do check it out and have feedback, I would love to hear it – good or bad. You can give feedback through Pluralsight or here on my blog. Either way, it would be appreciated. Thank you.