This post will be part 2 of a 4 part series in which I will step you through what is necessary to expose and access a multi-table SQL Server Azure database with built-in relationships. These steps were covered at a high-level in my talk , but in this series, I will go through each step in greater detail. The steps will consist of the following:
1.) Create a SQL Server Azure Database
2.) Create ASP.NET application to expose data as OData (covered in this post)
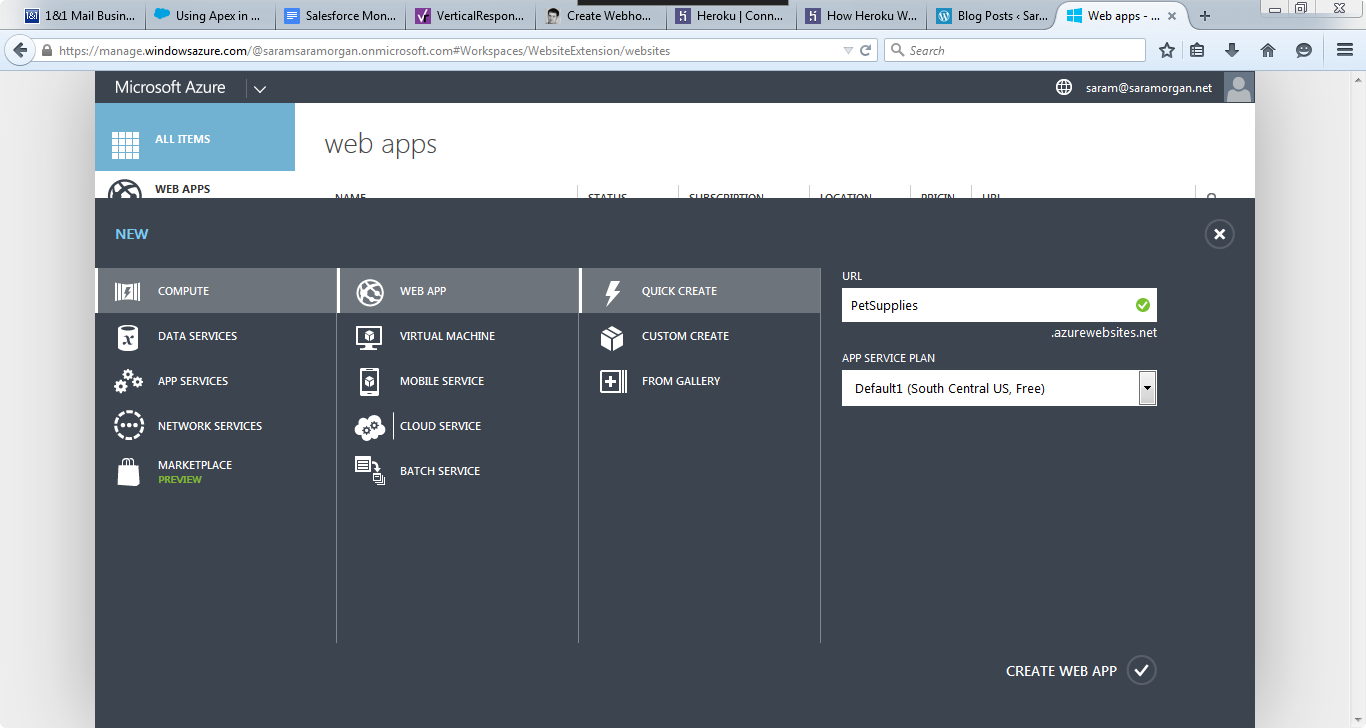
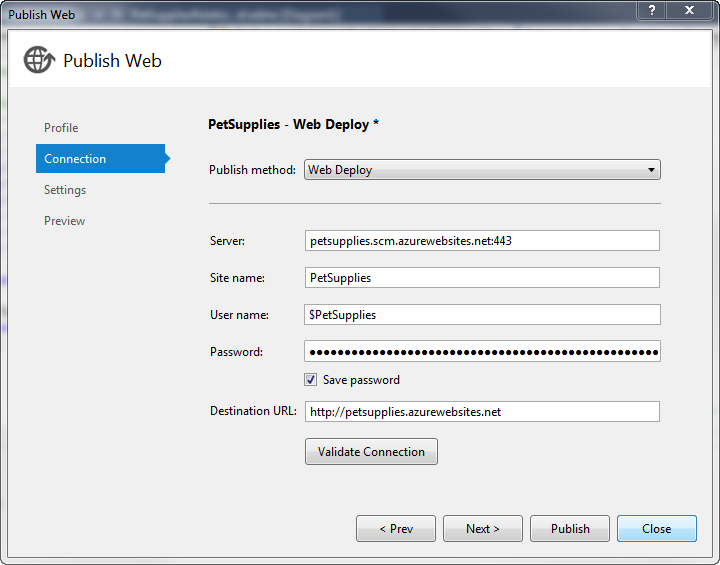
3.) Publish Web Application to Windows Azure
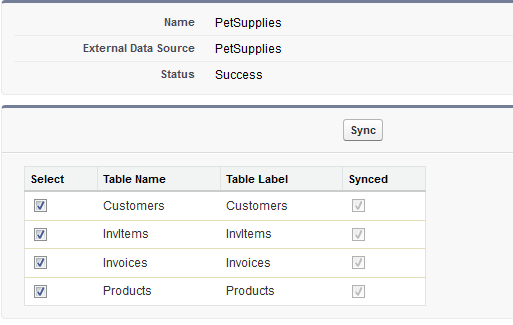
4.) Create External Data Source and Define Relationships in Salesforce
TIP: Click here to access the code for this post, along with the Powerpoint slides from my talk at Dreamforce 2015 (which is what this post series is based on). But, if you follow along with tutorial in this post, you will not need it since you will be generating the code for yourself.
Step Two: Create ASP.NET application to expose data as OData
I will be walking you through creating an ASP.NET application that utilizes a WCF (Windows Communication Foundation) data service, along with the WCF Data Services Entity Framework Provider to render the data created in Step One as an OData endpoint.
You will need a copy of Visual Studio to complete this next step. In this tutorial, I will be using Visual Studio 2015 Community version, which you can download for free by going to this link and clicking the Download button under Visual Studio Community.
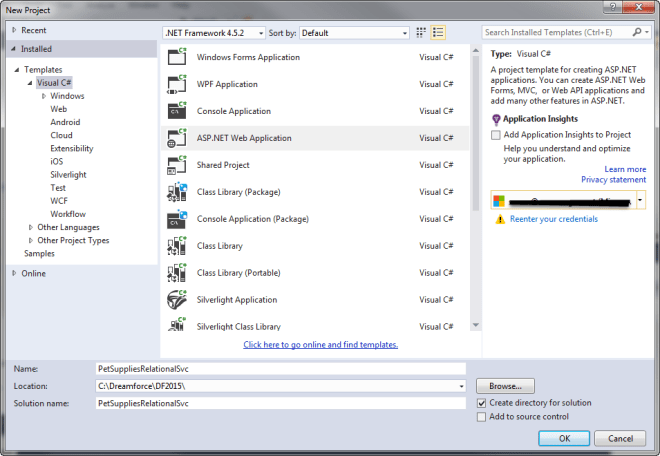
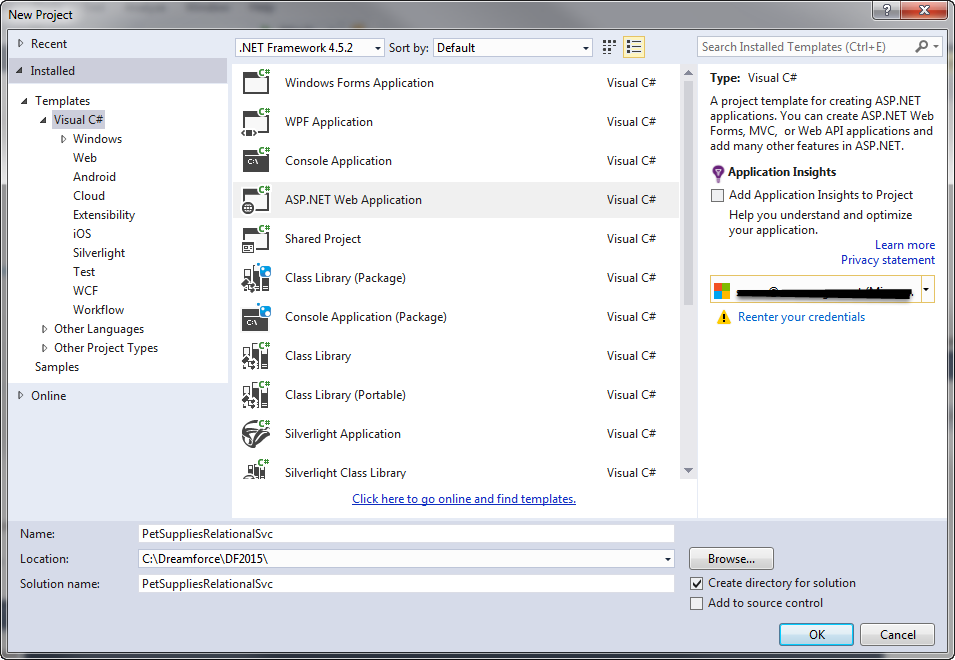
Once you have, open it up and create an ASP.NET Web Application using the Visual C# empty template. Name the project PetSuppliesRelationalSvc and save it somewhere on your local drive (see image below).
Add the Entity Data Model
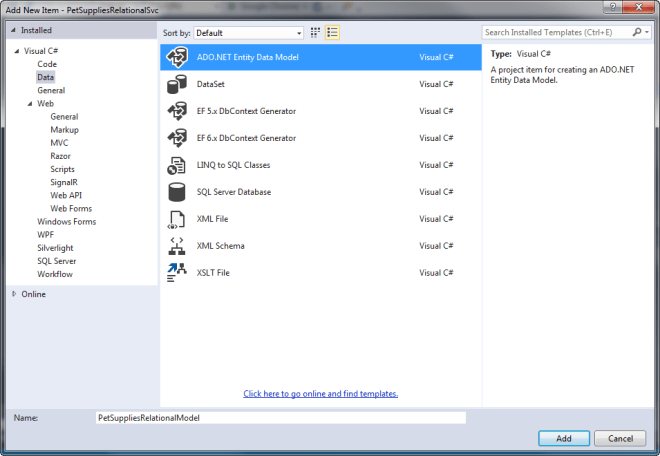
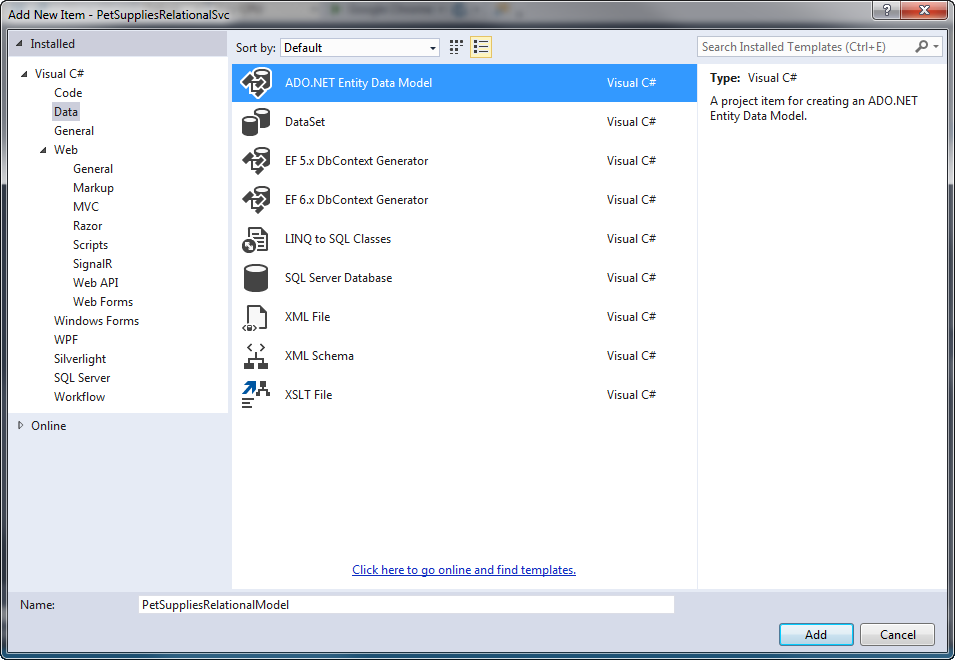
The first thing you will need to do is to add the Entity Data Model to your project by right-clicking the project in Solution Explorer and selecting Add | New Item. Select the Data Node in the left pane and from there select ADO.NET Entity Data Model. You can name the model PetSuppliesRelationalModel and click Add to continue (see image below).
A wizard will start and first ask you to choose the model contents. Since we are working with an existing database, you will want to select the default option of EF Designer from Database and click Next to continue. On the Choose Your Data Connection page, click New Connection. This is where you will enter the server name for your SQL Server Azure Database server, which should have been assigned when you created the database back in Step One.
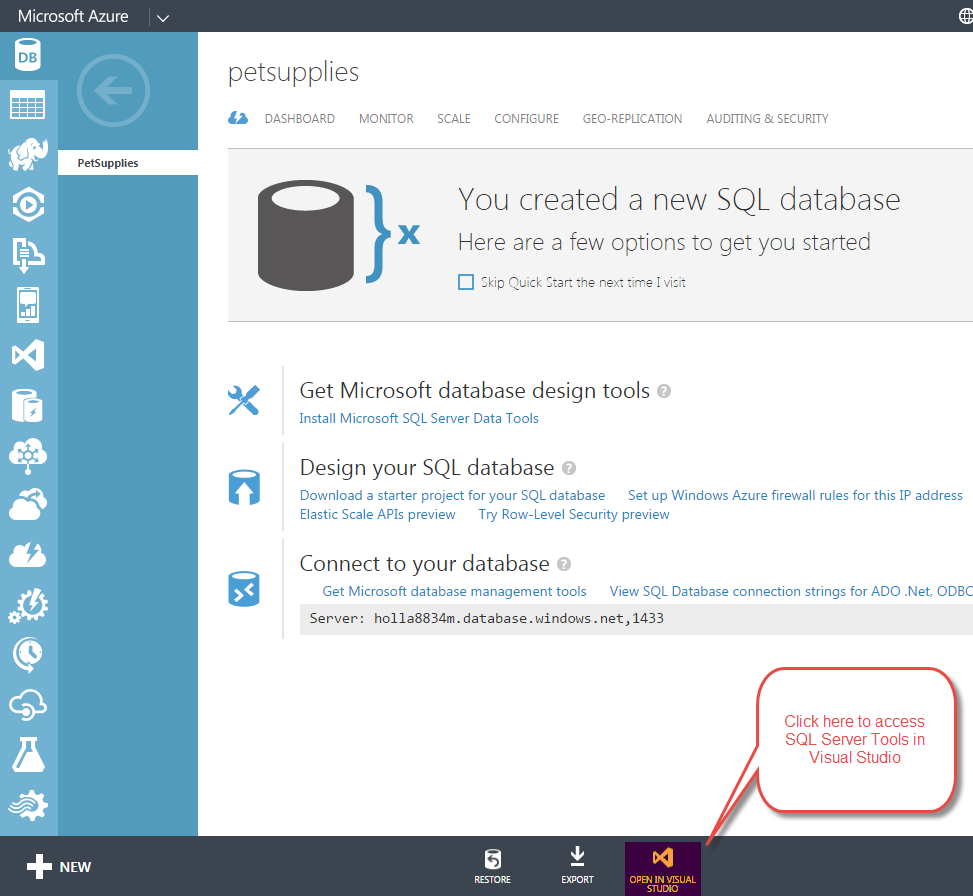
If you do not know the name of the server, you will need to log back in to your Microsoft Azure account and go to the Databases quick start page. It should be listed at the bottom of this page and will look something like the following:
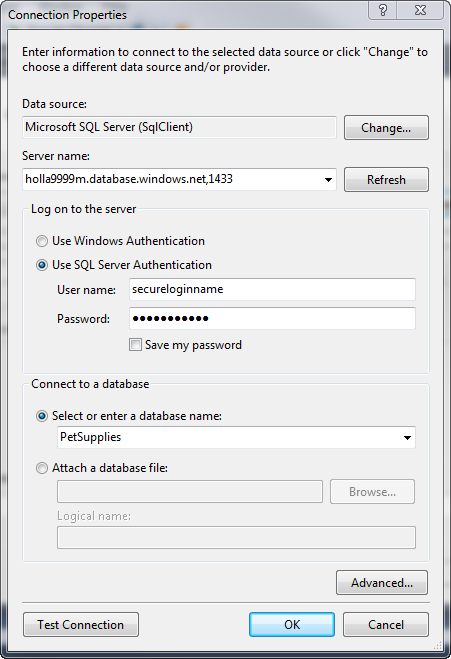
holla9999m.database.windows.net,1433
This entire string (including the comma and 1433 port assignment) should be copied into the server name textbox. You should also select the Use SQL Server Authentication radio button and enter the credentials you used to create the SQL Server Azure database. If the credentials are correct and your local IP Address has been configured to have access to the Azure firewall, you should be able to select PetSupplies as the Database (see image below) and when you click Test Connection, you should be get back a Connection successful message.
Once the credentials are entered, click OK to return back to the Choose Your Data Connection Wizard page. Since this is just a tutorial, you can go ahead and click “Yes, include the sensitive data in the connection string“, but if this was a real-world application, you may want to consider something more secure.
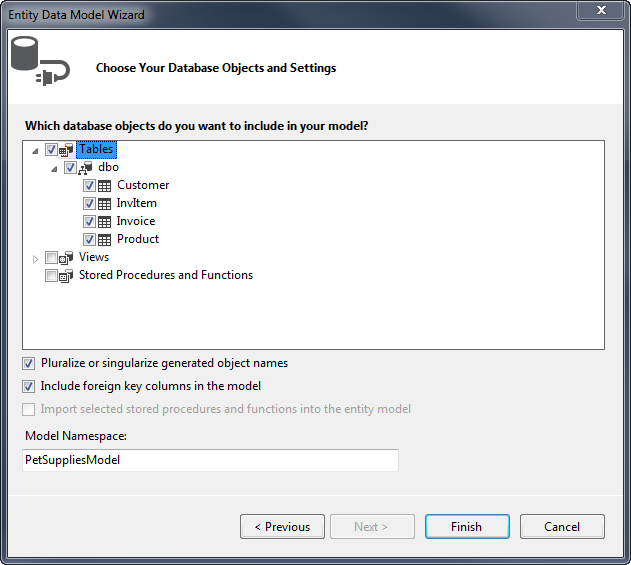
Click Next to continue and on the page where you choose your version of Entity Framework, leave the default selection as Entity Framework 6.x and click Next. On the Choose Your Database Objects and Settings page, select the checkbox next to Tables and enter PetSuppliesModel as the Model Namespace. Click Finish to complete the wizard.
You might see a Security Warning, but you can go ahead and click OK to run the template. It may take a few seconds for the wizard to build out all your code, but when it is done, you should see a schema diagram of the PetSupplies database. All the code that is needed to access the database has been generated for you. Wasn’t that easy?
Add the WCF Data Services Entity Framework Provider
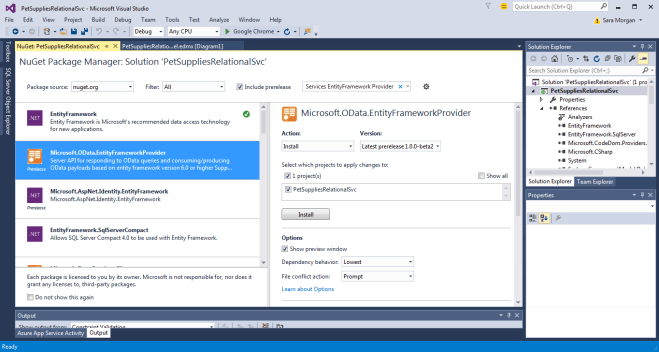
To get your SQL Server data into the OData format, you will need to install the WCF Data Services Entity Framework Provider (which as of this posting is still in beta). This is done by going to Tools | NuGet Package Manager | Manage NuGet Packages for Solution and clicking the Include Prerelease dropdownbox. You can then search for “WCF Data Services EntityFramework Provider” and once you find an entry for Microsoft.OData.EntityFrameworkProvider, click the Install button next to it (see image below).
You should get a preview box that lists all the changes that will be made to your project. Click OK and also click I Accept to accept the license agreement.
Add the WCF Data Service
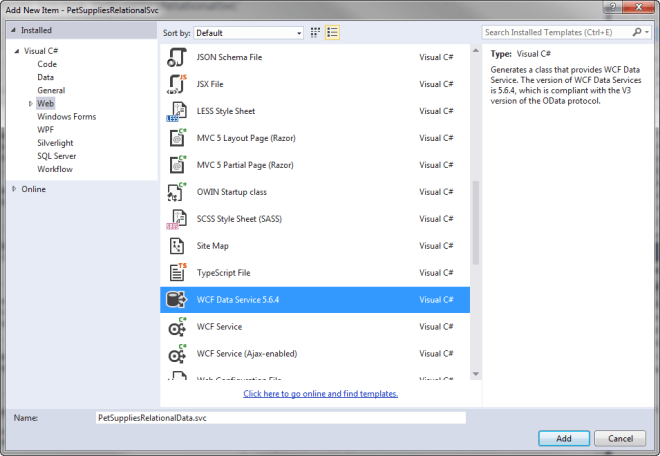
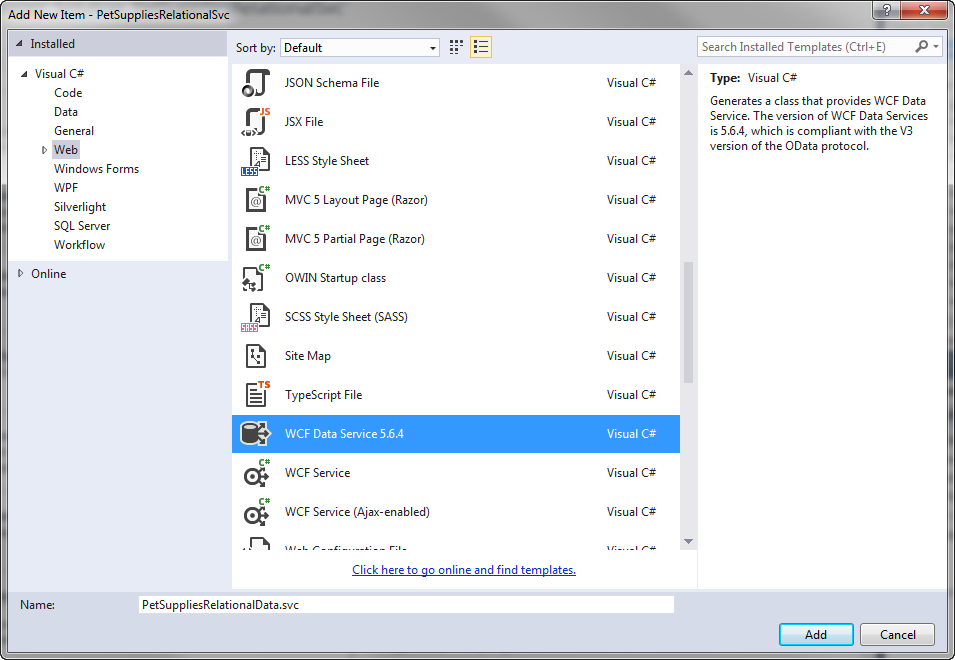
You are now ready to add the WCF Data Service that will be used to expose your OData. To do this, right-click the project and click Add | New Item. This time, select the Web node in the left pane and select WCF Data Service 5.6.4 as the Item template. Name the service PetSuppliesRelationalData.svc and click Add (see image below).
The code that is added to your project should contain TODO comments. The first change you will need to make is to add the data source class name where indicated in the class declaration. If you followed the naming I suggested in the tutorial, this should be PetSuppliesEntities.
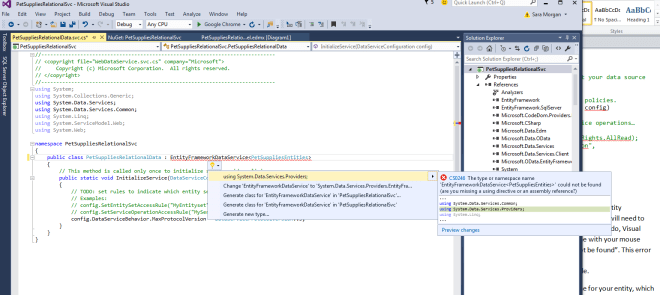
You will also need to change the type declaration from DataService to EntityFrameworkDataService. When you do this, you should get a red squiggly line under the code, indicating that the type could not be found. To correct this error, you will need to hover over the line of code (see image below) and click Show Potential Fixes. You can then select the line that says, “Using System.Data.Service.Providers” to add the reference and correct the problem.
I suggest that you add a line of code above the public class declaration that will apply the ServiceBehaviorAttribute and set the IncludeExceptionDetailInFaults property to a Boolean value of true. This will instruct the service to return unhandled exceptions as SOAP faults and will be helpful for debugging purposes. When you are done, the code should look like the following:
[System.ServiceModel.ServiceBehavior(IncludeExceptionDetailInFaults = true)]
public class PetSuppliesRelationalData : EntityFrameworkDataService
|
TIP: Make sure to set the value of the IncludeExceptionDetailInFaults property back to the default of false before deploying your solution to production.
The next TODO involves setting the rules to indicate which entity sets and service operations are visible or updatable. Since Lightning Connect only allows for read-only connections at this time (although I will be covering writable connections in later posts so stay tuned for that) the changes we will make will only involve un-commenting the line of code that sets the entity set access rule. We will then replace the word “MyEntityset” with “*” and leave the rights as AllRead. This tells the service that we want to expose all the entities as read-only.
After all the code changes are made, the PetSuppliesRelationalData.svc.cs file should look like the following:
using System;
using System.Collections.Generic;
using System.Data.Services;
using System.Data.Services.Common;
using System.Data.Services.Providers;
using System.Linq;
using System.ServiceModel.Web;
using System.Web;namespace PetSuppliesRelationalSvc
{
    [System.ServiceModel.ServiceBehavior(IncludeExceptionDetailInFaults = true)]
    public class PetSuppliesRelationalData : EntityFrameworkDataService {
         // This method is called only once to initialize service-wide policies.
         public static void InitializeService(DataServiceConfiguration config)
         {
            // TODO: set rules to indicate which entity sets and service operations...
            // Examples:
            config.SetEntitySetAccessRule("*", EntitySetRights.AllRead);
            // config.SetServiceOperationAccessRule("MyServiceOperation",
                     ServiceOperationRights.All);
            config.DataServiceBehavior.MaxProtocolVersion =
                     DataServiceProtocolVersion.V3;
          }
     }
}
|
And that is about it. The only thing left to do is to test that everything is working right. But before you do that, be sure and save all your changes.
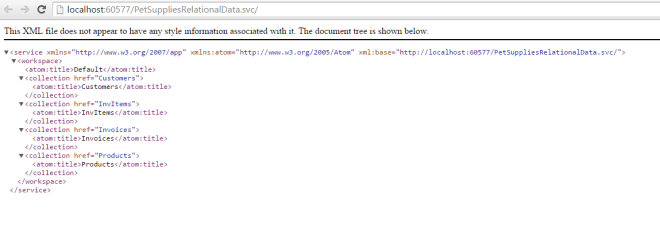
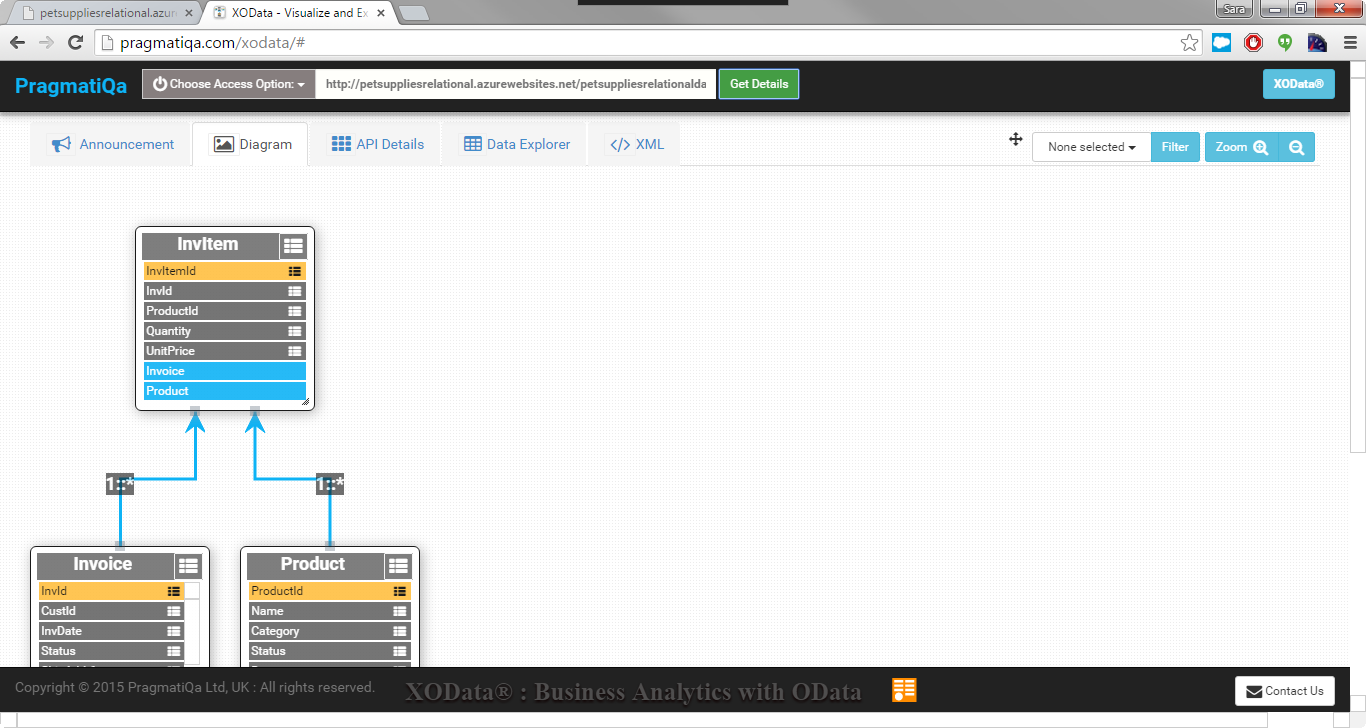
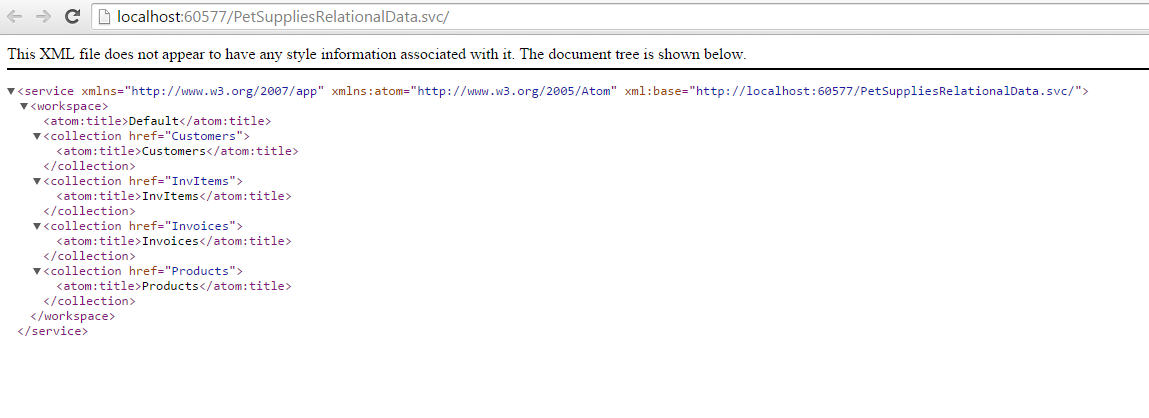
You can then right-click the PetSuppliesRelationalData.svc file in Solution Explorer and select View in Browser. When you do this, a browser window will open and load up your data service, listing all the entities exposed in XML format. The result should look similar to the image below. If you do not see this or see an error, then go back to see where you might have made a mistake and try again.
Final Words
I know this post may seem long and the steps complicated, but it really is a pretty straightforward process with 99.9% of the code being built for you. The longest part of this should be downloading and installing the latest version of Visual Studio.
Click here to see the third post in this four part series.


 I recently had the fortunate opportunity to provide early testing and feedback for the latest Superbadge released by Salesforce’s Trailhead. This one covers all the different aspects of being a
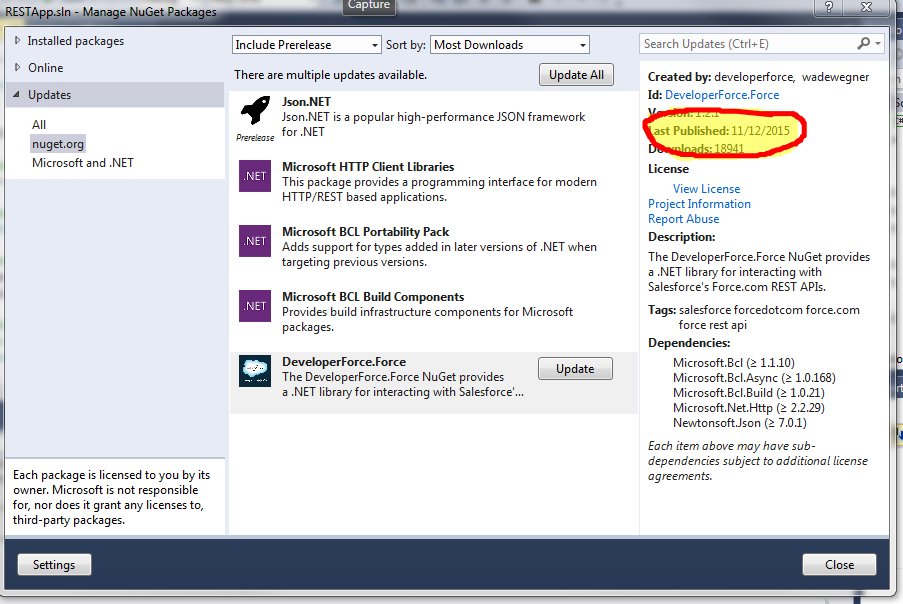


 relationships using Lightning Connect. The talk was based on an article I wrote for DeveloperForce earlier this year titled, “