This post will be part 3 of a 4 part series in which I will step you through what is necessary to expose and access a multi-table SQL Server Azure database with built-in relationships. These steps were covered at a high-level in my talk , but in this series, I will go through each step in greater detail. The steps will consist of the following:
1.) Create a SQL Server Azure Database
2.) Create ASP.NET application to expose data as OData
3.) Publish Web Application to Windows Azure (covered in this post)
4.) Create External Data Source and Define Relationships in Salesforce
TIP: Click here to access the code for this post, along with the Powerpoint slides from my talk at Dreamforce 2015 (which is what this post series is based on). But, if you follow along with tutorial in this post, you will not need it since you will be generating the code for yourself.
Step 3: Publish Web Application to Windows Azure
In Step 2, I walked you through creating an ASP.NET web application that exposed SQL Server Azure data as OData through a web service. As it is now, that web service will run only on your local machine. In order for Salesforce to be able to access the data exposed by the web service, it must be published to an external website.
Create Web App in Windows Azure
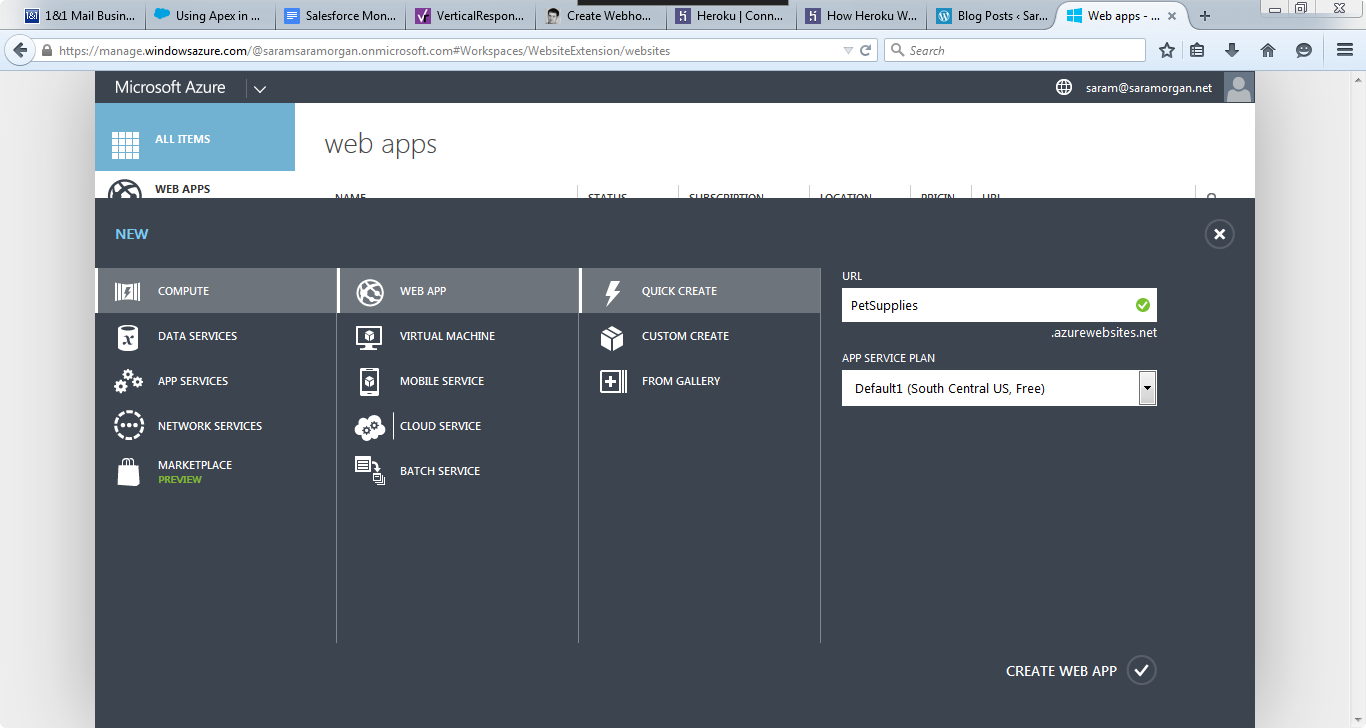
You can publish the web application easily to Windows Azure, but you will first need to create a website/ web app in the Windows Azure Management Portal. To do so, log in to Windows Azure and click on the Web Apps icon in the left menu bar. Click New (next to a big plus sign) in the bottom right corner of the web apps page. From the new menu, click Quick Create and enter a unique name that will be used in the URL for this website (see below) and click Create Web App.
 It should take a few minutes for the web app to be created. When it is done, it should show a status as Running. Click on the web app to go to the quick start page and from there, select the Download the publish profile link under Publish your app. Save the file it generates to you local machine.
Use the Publish Web Wizard
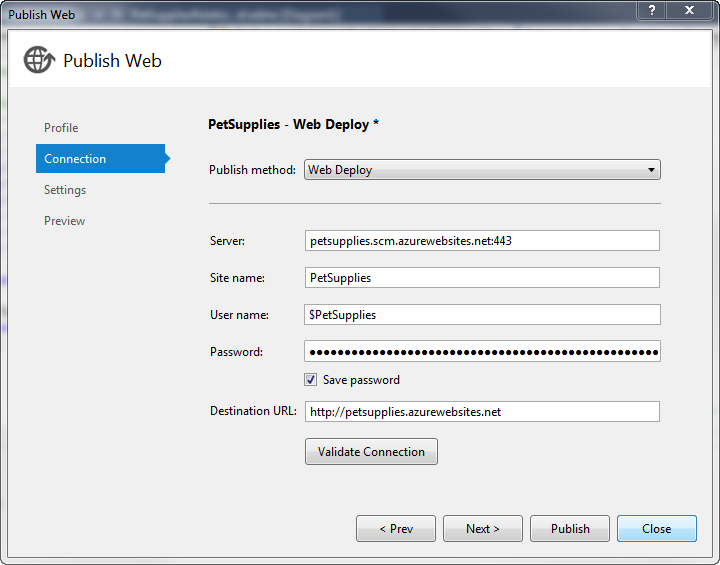
Visual Studio has a nice wizard that you can use for publishing applications to external sites. You can access it by right-clicking the project in Solution Explorer and selecting Publish. On the first page of the wizard, click Import and the browse to the location on your machine where you saved the publish profile.
The next page of the wizard should have all the settings entered for you as it got this information from the publish profile. Make sure you click the Validate Connection button (see image below) to verify that your connection is good.
 Once validated, click Publish and wait for the publish to complete. When it is done, you will see a message in the status bar of Visual Studio indicating it is finished.
TIP: Be prepared for the initial publish to take several minutes to complete. If you try to access the web app before it has finished, you will get errors telling you that the resource cannot be found.
You can then access the web service using a web browser. The URL should be something like the following:
http://<your website name>.azurewebsites.net/<your service name>
If successful, you should see the same XML results that were displayed when you browsed to the service on your local machine.
Query your OData in the Web Browser
Because your data has been published to the web as OData, you, or anyone else can access the data directly using any web browser. For example, if you wanted to see all the data in the customers table, you could add the entity name Customers (note that it is case sensitive) to the end of the URL and hit enter. If you are using a browser such as Google Chrome, this will display for you ALL the customer data in XML format.
Great, but what if you just wanted to see data for a certain customer?
To accomplish this, you can add query string parameters to the end of the URL, such as the following:
Customers?$filter=Addr1 eq ‘123 Main St’
The query string above can be used to return all data from the Customers entity where the Addr1 field is equal to ‘123 Main St’. For the PetSupplies data, this should return a result such as what you see below.
 Ok, but what if you wanted to see the data in a nicer format than XML?
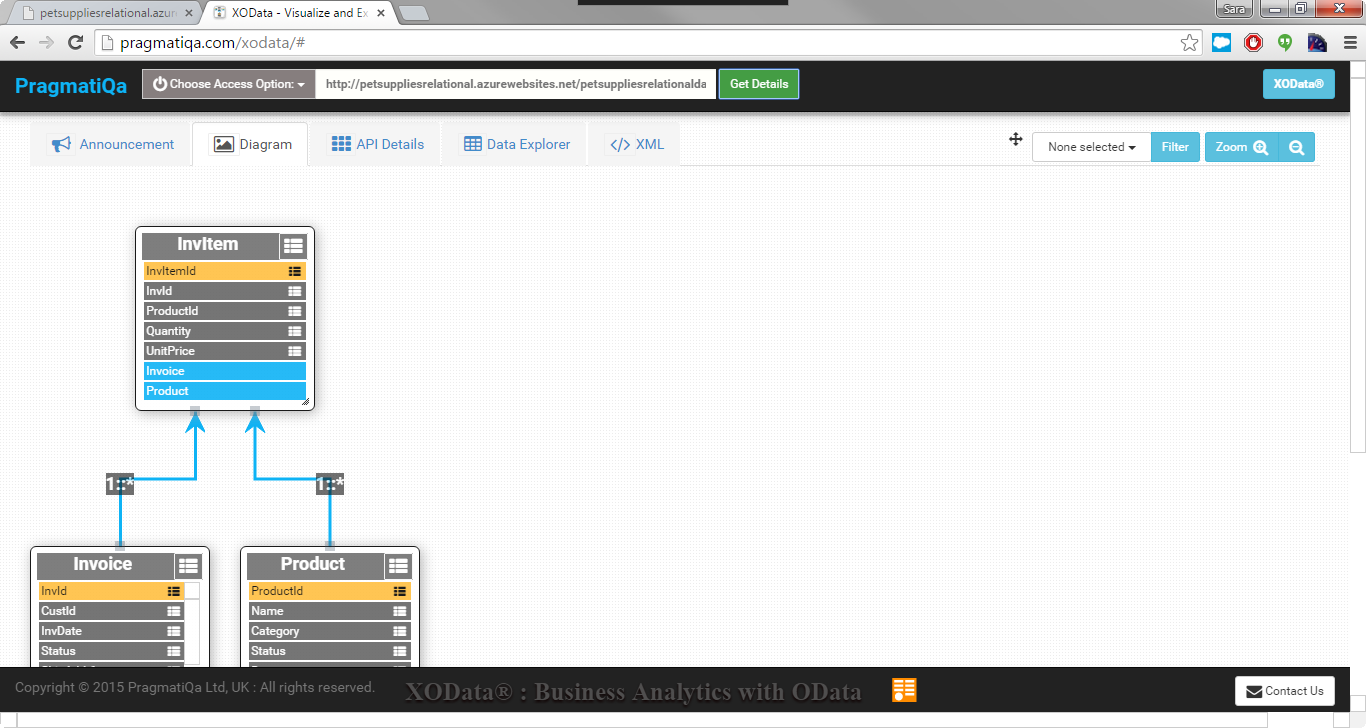
Well, luckily there is a wonderful free online tool called XOData, that can be used to explore publicly exposed OData. The tool is made by a company called PragmatiQa and to access xodata, go to the following URL:
From there, click Choose Access Option and select Metadata URL. You can then enter the URL of your service, including the /$metadata at the end of the URL. So for the PetSupplies database, the URL would be:
http://petsuppliesrelational.azurewebsites.net/petsuppliesrelationaldata.svc/$metadata
Once entered, click Get Details and you should see results similar to the following:
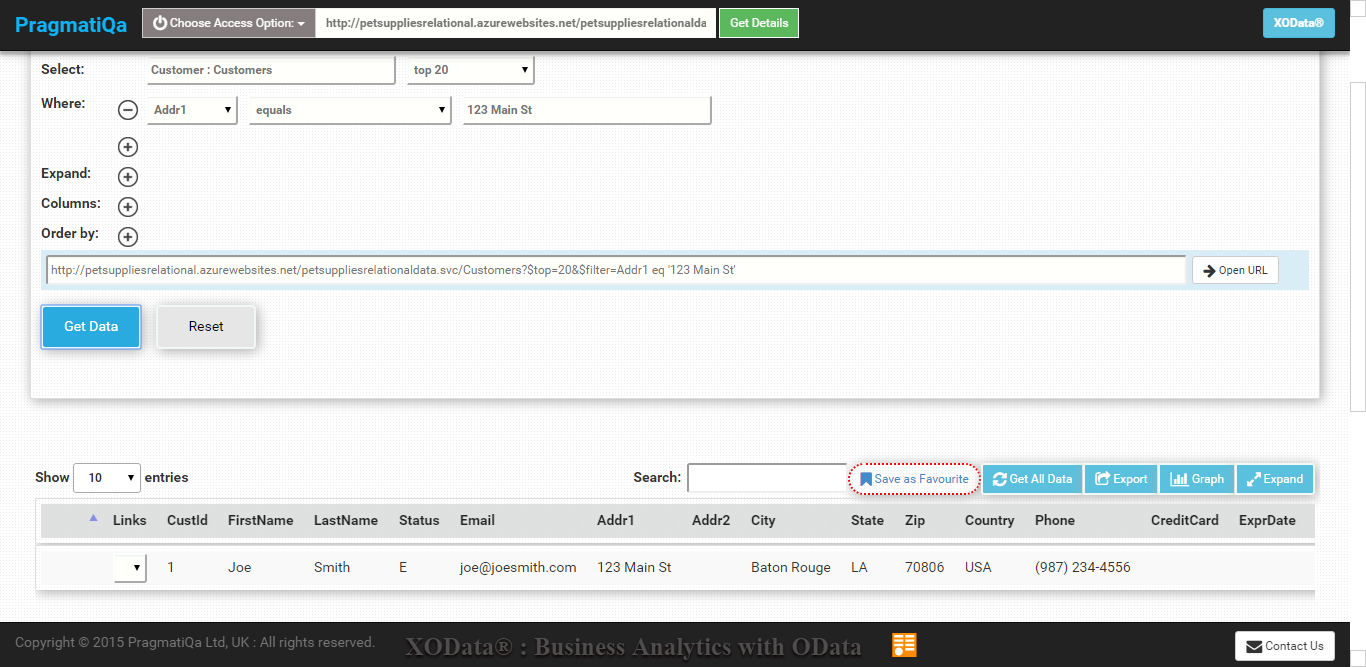
 You can then select the Data Explorer tab and be able to easily select, filter and order data from any of the exposed entities. The results will be displayed in a nice table format that is much easier to read than the XML you saw earlier (see image below).
Isn’t that beautiful? I really think the guys at PragmatiQa did a GREAT job with that tool.
And finally, stay tuned for the final post (in about a week), where I will show you how to access the oData in Salesforce by creating an External Data Source.

2 thoughts on “Step Three: Publish Web Application to Windows Azure (3 of 4)”