This will be the second of a series of posts I will be doing over the next few weeks. They will all lead up to the introduction of my new course titled, “Building Your First Lightning Web Component for Salesforce” from Pluralsight.
Setting Up Your Development Environment (in 5 somewhat easy steps)
Step 1: Signup for a Developer Org
I know you may already have one of these, but I suggest you sign up for another one since this will be used primarily as a DevHub. You go can signup here.
The primary function of the DevHub is to create and manage scratch orgs. To enable the DevHub, go to Setup and type Dev in the Quick Find Box and go to the DevHub Page. Click the Enable button and just remember that once enabled, you cannot disable a DevHub org.
Step 2: Install the latest version of Visual Studio Code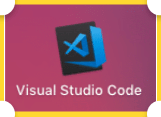
Even if you already have Visual Studio Code running on your machine, I suggest you to download and install this version by going here.
This is this is the IDE that Salesforce has chosen to recommend and fully support for LWC.
Step 3: Install the Salesforce CLI
The CLI, or Command Line Interface helps to simplify Salesforce development by allowing you as a developer to pretty much do everything you need to do to develop, test and deploy your code.
Be aware that unlike the rest of Salesforce, the CLI is updated weekly. You can download the version for your operating system here. Just remember to run the sfdx update command frequently so you know you have the latest version.
Step 4: Install the Salesforce Extension Pack for Visual Studio Code
To get this installed, you should launch Visual Studio Code and when you do,you will want to start by clicking the extensions icon on the left toolbar. If you start to type in Salesforce, you should see a list of all the Salesforce extensions. For now, you will want to click install for the Salesforce Extension Pack.

Step 5: Install the Java Platform Standard Edition Development Kit
This can be found on the Oracle website and you will want to make sure you have installed the latest version 8 or 11 for your particular operating system. During the installation, you will need to ensure that the install points to the directories listed here for either Windows or the mac:
- Windows: C:\Program Files\Java\jdk1.8.0_221.jdk\
- MacOS: /Library/Java/JavaVirtualMachines/jdk1.8.0_221.jdk/Contents/Home.
Once the installation is complete you will also need to change a setting in VS Code to reflect this. You do this by going to File, Preferences and Settings. This is where you will point VS code to the right Java install. Enter apex java and select Salesforcedx-vscode-apex. Notice that the path here is not the one you installed to.
UPDATED Instructions below:
So,we will need to change this. You can do that by clicking on the input box, right below the wrong setting and then entering the correct one for your operating system. I am on Windows here. And finally you will relaunch VS Code.
After you re-launch, go to the terminal and type java -version and you should see the output like below.

I know this seems like a pain, but there are some features in the Salesforce Extension pack that rely on this SDK, so it is important that you install it.
That’s it (Phew)…
See you next week, when we will be talking about composition and communication of your LWC’s.

 Get Ready to Play