After spending quite a lot of time working with the Salesforce Extensions for Visual Studio Code and discovering many hidden gems, here is a list of my top 5 tips. Hope they help you in your development journey.
#1 – Install the Expanded Extension Pack
This VERY handy version of the regular Salesforce Extension Pack, includes not only all the core SFDX plugin’s, but all the third-party ones you might need, like Prettier, ESLint, etc.

#2 – Run Update as Often as Possible
This is perhaps the MOST important tip I will offer. Unlike the rest of Salesforce software, the SS Salesforce Extensions are updated every week. That’s right. And they are constantly adding really cool features, so if you have not run…
sfdx updatein a while, you are probably wayyyyy behind and need to do it immediately!
#3 – Use the CLI Help Feature
For all of you that depend solely on the Command Palette, you really need to start using the built-in help that is offered. Come on, the Terminal is not that scary.
Not only will you get access to some really helpful info, but you will learn a heck of a lot about the CLI in general. Start by just typing sfdx help.
Go even further down the stack, but use –help past the first level. For example, to see the help for the project create command, so the following:
sfdx force:project:create --help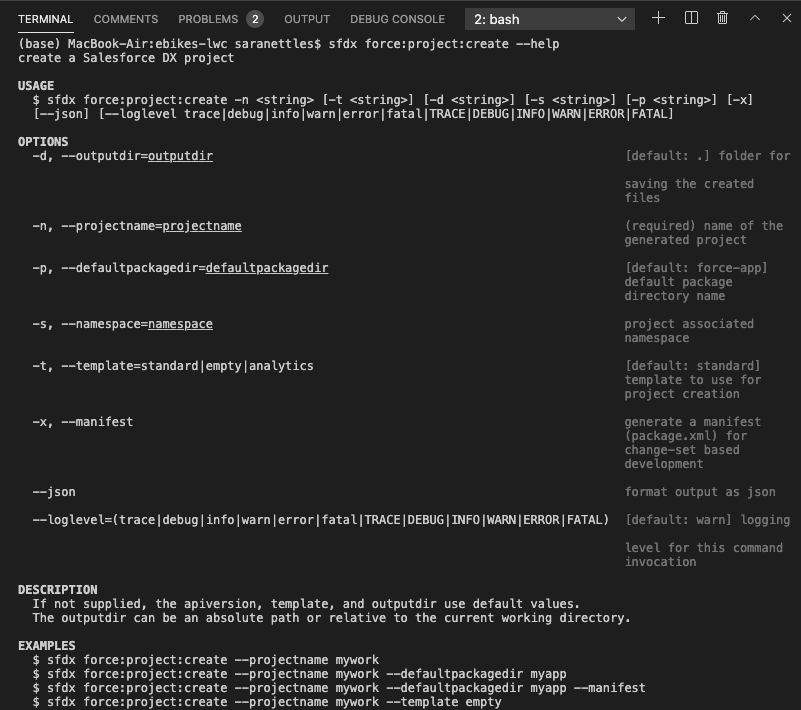
#4 – Use Code Completion and Snippets
If you do a lot of work with Apex, then you definitely want to check out using the Code Completion and Code Snippets features. This can be really helpful when creating Apex classes or triggers (especially if you are like me and do not do it that often).
#5 – See all SFDX Commands
When you are first learning how to work with the extensions, it can be helpful to see a list of all the available commands. This is accomplished by entering the following command: sfdx commands


Thanks for the tips. Good to know about the new features…